


-
How do I assemble my inflatable boat?
-
How do I deflate & store the boat in the carrying?
-
How to register my inflatable boat?
-
What's the difference between PVC & Hypalon or CSM inflatable boats?
-
How to affix registration numbers to PVC boat?
-
Slow air leak in tubes - valve tightening & cleaning
-
Slow air leak in tubes - valve gluing
-
Slow air leak in tubes - seam gluing
-
What do Newport boats look like in the water?
-
I have a small drain plug leak
-
How to patch larger tears?
-
How to clean my Newport PVC inflatable boat?
-
Inflatable boat owners' manual
-
What are my boat's dimensions?
-
How do I properly tow my inflatable boat?
-
How do the air valves work?
-
Do you ship to Alaska, Hawaii, and Canada?
-
I found a coupon, but it isn't working. Why not?
1. How do I assemble my inflatable boat?
Assembly of your Newport inflatable boat will take about 15-20 minutes (especially the first time). Please view the detailed Owner's Manual for Wood Floor Inflatable Boat and Owner's Manual for Air Floor Inflatable Boat for the clearest step-by-step directions. You can also view the brief assembly instruction video below on how to assemble your inflatable boat.
Hardwood Floor
Air Floor
Assembly of your Newport inflatable boat will take about 15-20 minutes (especially the first time). Please view the above video and the below steps to aid in the assembly and installation of the aluminum framed wooden floor boards. This part of the process will take about 5 minutes by using the following steps.
STEP A: Properly place Newport inflatable boat floor boards inside the boat in the correct order and attach the inflatable boat floor boards at the joint locations. Watch the video above for proper technique & floorboard alignment instructions.
STEP B: Conjoin each individual floor together by inserting each floor boat (in the correct order) into the appropriate bracket. Once again, watch the above video for proper technique & inflatable boat floor board alignment instructions.
STEP C: Now that the inflatable boat floor board panels are properly and even placed within the boat (and the joints are properly connected) grab all the stringers and prepare for the aluminum stringer insertion. The longer side of the stinger is to be placed against the floor of the inflatable boat (leaving the more narrow/thin portion of the stringer facing upward. The motion to set the stingers in place is a rolling motion (not a sliding motion). The stingers are designed to roll into place and to secure snugly and not move. Watch video above for proper Newport inflatable boat stringer installation.
STEP D: Repeat the above steps for each individual aluminum stringer so that each joint of the wood panel floors are properly secured in place. The aluminum framed wood panel flooring provides an extremely rigid and secure flooring system for your boat. Wood flooring is recommended for multi passenger uses, dogs, standing, fishing, and all versatile inflatable boating applications. Watch the video above for proper technique & floor board alignment instructions.
2. How do I to deflate & store boat in the carrying?
- Hardwood Floor
- Air Floor
3. How to register my inflatable boat?
4. What's the difference between PVC & Hypalon or CSM inflatable boats?
Almost all inflatable boats are constructed with either PVC material or Hypalon/CSM material. Hypalon was discontinued by its manufacturer (DuPont) an is now sold under it's slightly different formula and new name "CSM" or Chlorosulfonated Polyethylene Rubber.
PVC INFLATABLE BOAT - PROS
- Much less expensive than Hypalon or CSM.
- More abrasion resistant. More resistant against scratching, scuffing, & damage caused from running up on shore.
PVC INFLATABLE BOAT - CONS
- Will not last as long as Hypalon/CSM when exposed to direct sunlight. The extended exposure to direct sunlight will cause PVC material to turn dry, brittle, discolor, and lose it's flexible properties. Extended exposure to direct sunlight will negatively affect all boats constructed with PVC. However, this negative property is easily remedied by not leaving the boat exposed to the elements for extended periods of time.
HYPALON/CSM INFLATABLE BOAT - PROS
- Much greater resistance to extended exposure to direct sunlight. A boat constructed with Hypalon will last much longer than a boat constructed with PVC, if they are both left out in the direct sunlight for an extended period of time. Once again, this is easily remedied by not leaving the boat out exposed to the elements for extended periods of time.
- Greater resistance to chemicals.
HYPALON/CSM INFLATABLE BOAT - CONS
- - Almost 3x the cost of PVC. Costs are much greater as well as the supply of this material is much more limited.
In summary, there is one major difference between PVC & Hypalon/CSM inflatable boats. This difference is how they react to extended exposure to direct sunlight. For PVC boats that are poorly cared for and that are left uncovered, this difference will be noticed. However, for properly cared for PVC boats, and for PVC boats that are stored out of the elements during extended periods of non-use, this difference will be virtually unnoticeable.
5. How to affix registration numbers to PVC boat?
- The most effective method of affixing registration numbers to a PVC inflatable boat is to put the registration numbers on a 3 inch high board and then hang the board over the side of the boat as near to the bow as possible. The perimeter rope handles that are included on all Newport inflatable boats, work as a great attachment point. USCG rules say that the vessels registration numbers must be visible at all times (not permanently attached).
- If you're insistent on permanently attaching letters to your boats, we do not recommend using stickers. These almost always crack and fall off within a year. Instead, we recommend using a stencil and then using either a permanent magic marker (which works great) or using Krylon spray paint with very light pre-coat primer. The best spray paint is Krylon Fusion for Plastic (2326).
6. Slow air leak in tubes - valve tightening & cleaning
Note: 95% of inflatable boat slow air leaks can be attributed to loose or improperly fitted air valves. All Newport products are pressure tested and logged three times during the production process. The third and final air pressure test consists of the entire boat being inflated to capacity and then PSI gauged and logged 4 times during a 24-hour period. This extreme attention to detail & obsession with quality ensures that all defective products are caught before they are shipped to customers. If you’re experiencing a rapid air leak that can be heard or seen, then this means that you are not properly locking the air valve.
If you're experiencing an air leak that is only noticeable over a several day or week period, then this means only 1 of 3 possible events are occurring (Tear in the fabric, leaky seam, or air valve leak). Remember, 95% of all slow air leaks can be attributed to loose or improperly fitted air valves.
FIND THE PROBLEM:
Newport inflatable boats use interior baffles, so it is possible for a leak in one air chamber to affect or cause a neighboring chamber to become soft as well. So the first thing you need to do is determine which chamber is the problem chamber. To do this, you will need to deflate all air chambers and then fully inflate only 1 air chamber at a time. After fully inflating 1 air chamber, close the valve cap and use a spray bottle of soapy water (the more soap the better) and thoroughly spray the solution all over the air valve. You’re looking to find small bubbles forming around the inside of the cap or the outside perimeter of the valve. If bubbles are found, the problem is found. Remember you’re looking for even extremely tiny bubbles and in cases of slow air leaks it helps to apply pressure by sitting on the tube to help make the leak more noticeable when soapy water has been applied. Also we recommend that you apply the soapy water generously and then sit on the tube for 3-4 minutes and wait to see if even very small bubbles form. If the inflated chamber does not produce any bubbles then repeat the above steps with each of the other chambers & valves in order to pinpoint the leak.
FIX THE PROBLEM:
When the soapy mixture was applied, if bubbles were found around the valve perimeter, then this means that the valve needs to be tightened, reoriented (by reinstalling), or your valve is damaged and needs to be replaced. View video “Slow Air Leak in Tubes – How to Find & Fix” for how to remove & reinstall.
It is possible that over time, dirt, debris, salt, or any other build up may accumulate on the inside rubber seal of the valve. This rubber seal creates the air-tight seal that is needed to keep your tubes fully inflated, so many times this accumulation of debris can cause a small gradual air leak that can make the air chambers soft. The best way to remove or clean this debris is to use the foot pump to blow air throughout the valve by placing the air nozzle about 2 inches away from the valve and pumping the pump. However the best way to clean the valves is to fully remove them by using the valve wrench that can be found in your repair kit. If you cannot find this piece you can get them from our website (Valve Repair Kit). Clean the inner rubber seal with a cotton swab and then re-install the valve. Instructions for doing this can be found in the video “Slow Air Leak in Tubes - How to Find & Fix”.
If it’s determined that the leak is coming from around the valve perimeter, you can also apply a thin layer of glue around the valve housing as well as on the hole where the cap string attaches to the valve. Many times this simple solution can solve the problem as well. You can either use glue or any household standard silicone for this quick fix as well.
7. Slow air leak in tubes - valve gluing
- Be sure to view the full PDF document that shows all repair instructions. This can be found here in the downloads section.
8. Slow air leak in tubes - seam gluing
- Be sure to view the full PDF document that shows all repair instructions. This can be found here in the downloads section.
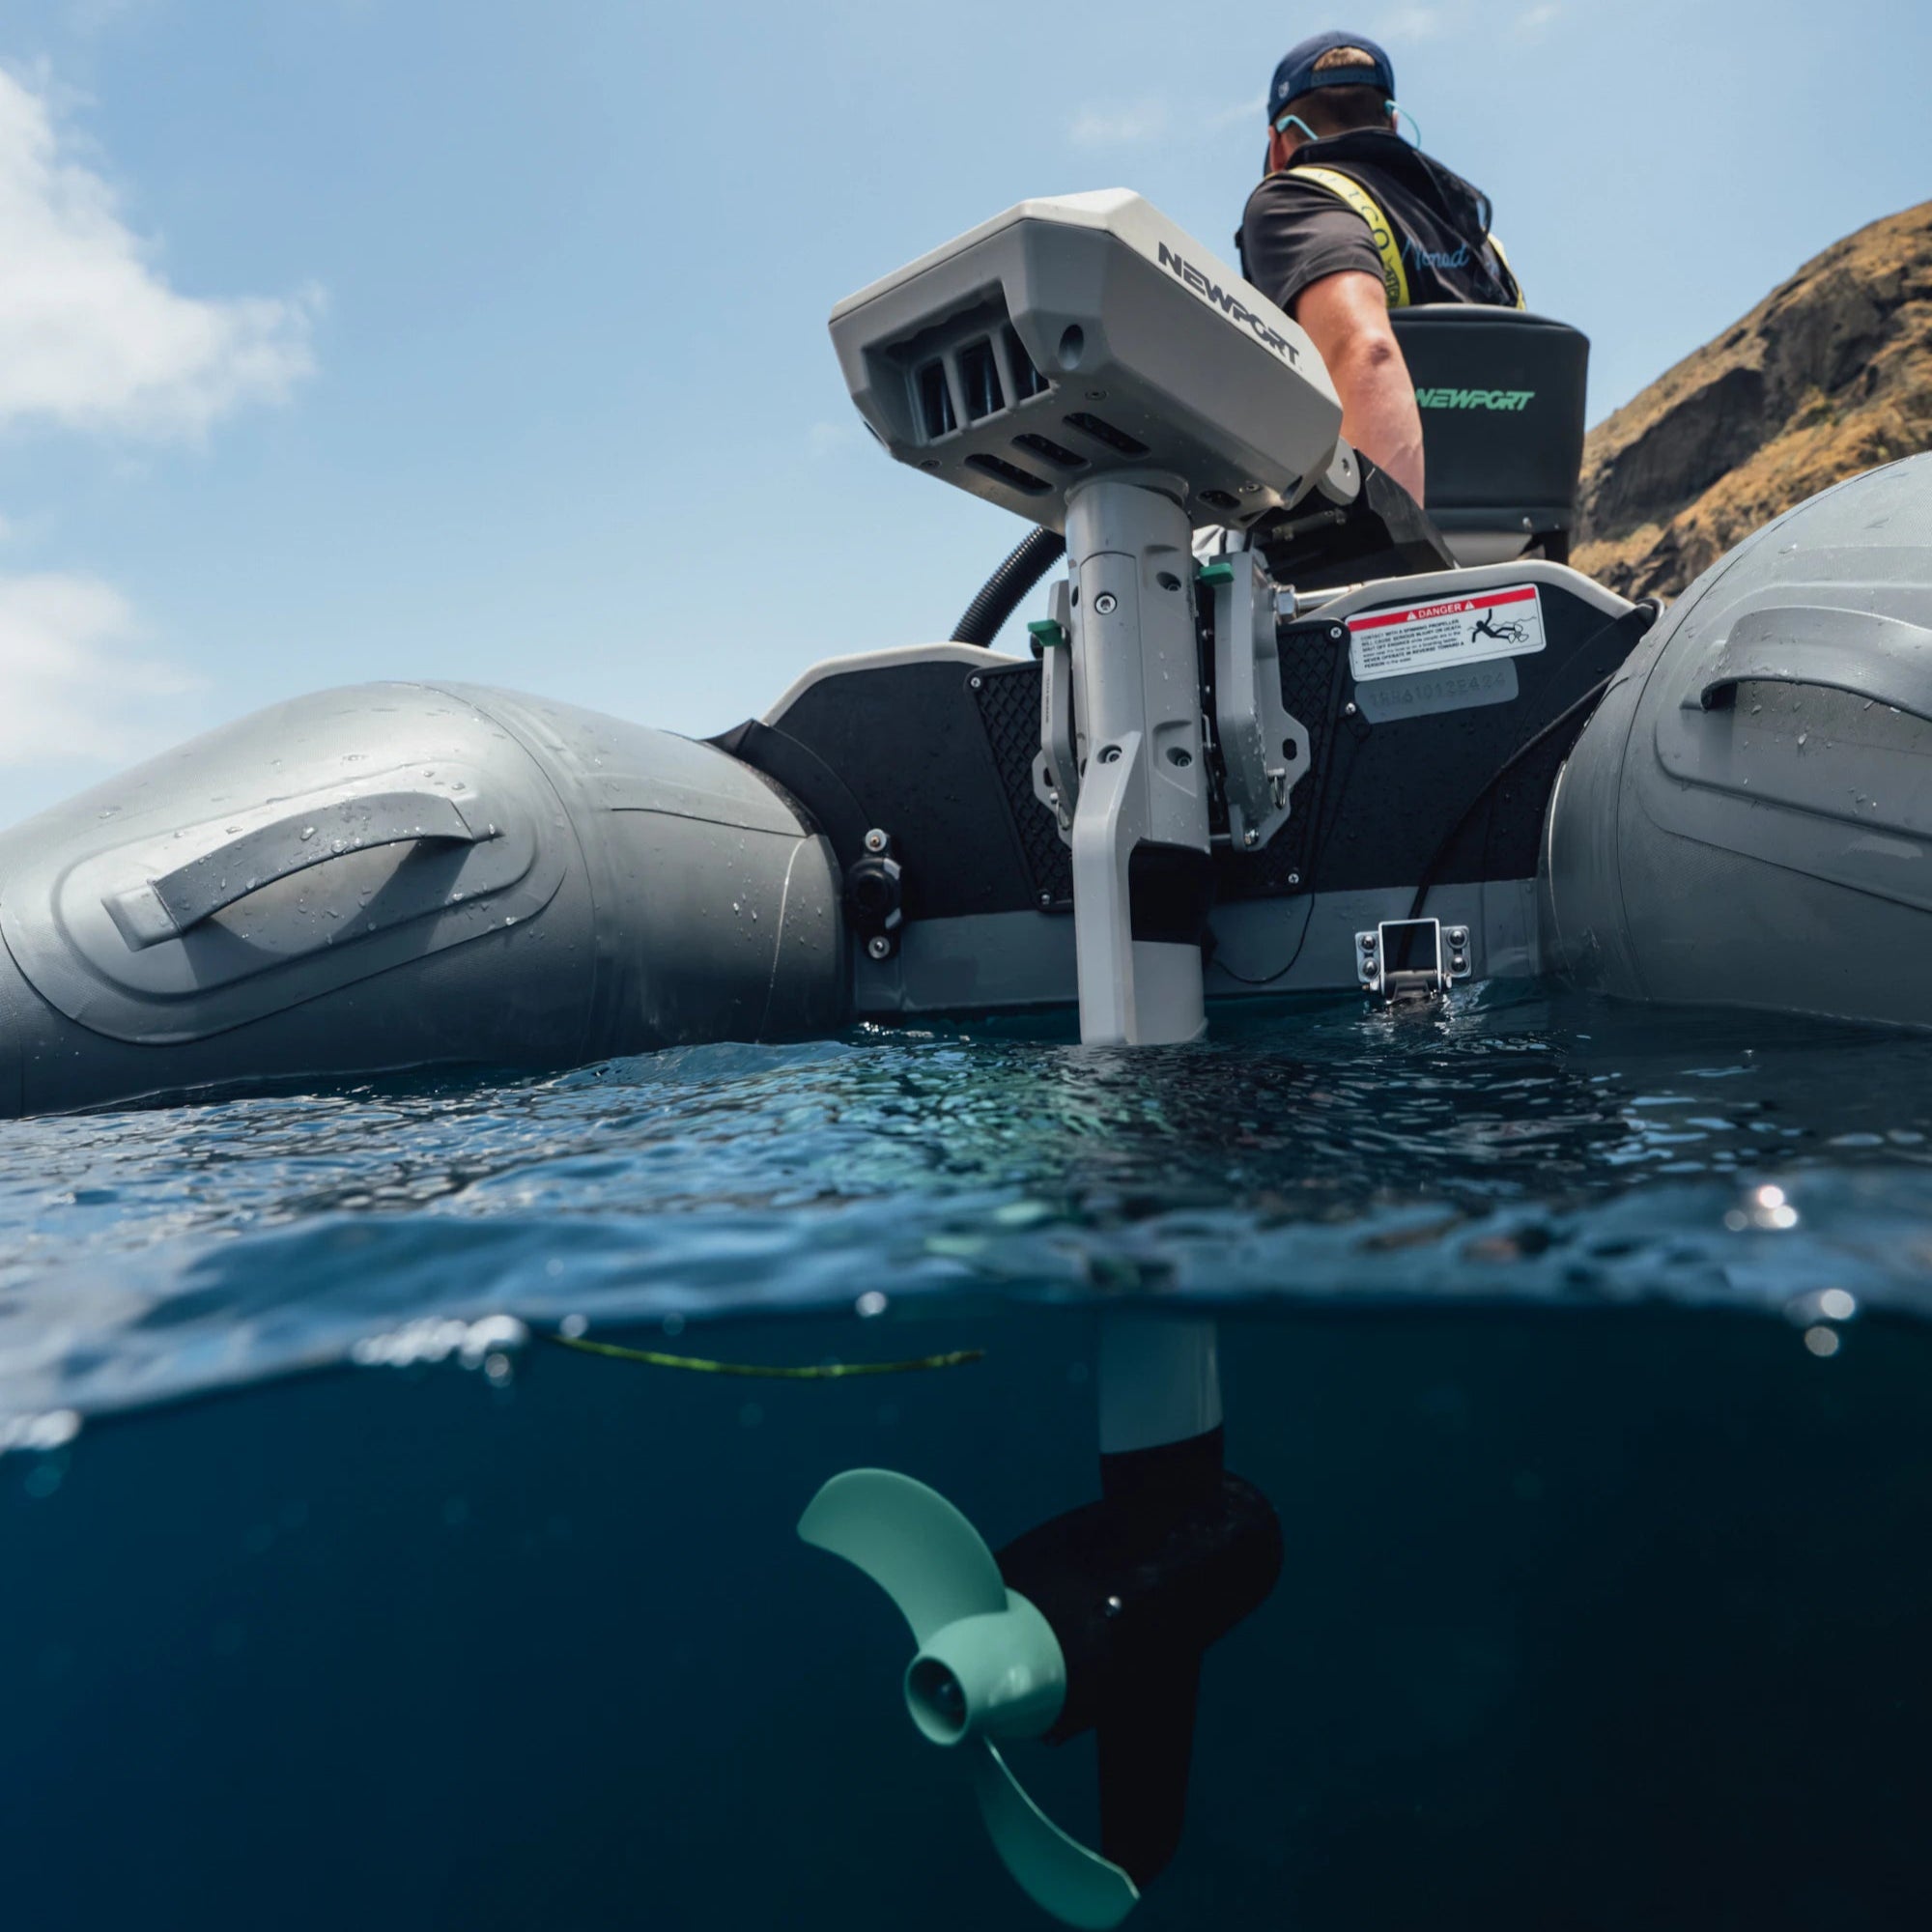
9. What do Newport boats look like in the water?
10. I have a small drain plug leak
- Fixing a leaking drain plug is simple and quick. Use silicon caulk from your neighborhood hardware store. First remove the entire drain plug assembly. Then generously apply the silicone caulk all over the inside and outside of the drain hole. Reinstall the drain plug and then apply more silicone caulk around all the edges. Wait at least 24 hours and this will solve the leaking drain.
11. How to patch larger tears?
- Cut a piece of repair material large enough to overlap the damaged area by approximately 2 inches and round off the edges. Using a fine brush, apply glue to the under side of the patch and around the area to be repaired. Only apply a thin layer, too much glue will often interfere with a proper repair Wait 10 minutes for glue to set. Then apply a second thin layer of glue to both the patch and the boat as well. Wait another 8 minutes for glue to set. Then apply a 3rd very thin layer of glue to the patch and the boat. Let sit for 5 minutes (don’t allow it to completely dry) and then firmly place patch on the damaged area. Apply patch so that all air bubbles will be forced out of the patch. Wait 10 minutes, and then inflate the chamber very slightly, just so the tube is lifted away from any other side of the tube, so it doesn’t get glued together. Use a weight to apply 3‐5 lbs. of pressure for 24 hours. After the patch has dried, apply glue around the edges for a complete seal (then let dry an additional 12 hours).
12. How to clean my Newport PVC inflatable boat?
- Keeping your inflatable boat clean as well as storing the boat properly is the main factor in determining your boats lifespan. The quickest way to lower your boats useful life is to leave the boat out in the open, exposed to the harmful rays of the sun. In addition, storing your boat in a damp, non-ventilated location will also cause severe damage to your inflatable boat, and will limit it's useful life. We recommend that when the boat is not in use, it is dried, placed in its bag, and then stored in a well ventilated and fully protected area away from direct sunlight, extreme temperatures, and high humidity.
- As for cleaning your PVC inflatable boat. We recommend that you only use cleaning products that are approved for use on PVC materials. Do not use standard household cleaners like Windex or bleach, because they will damage the PVC fabrics protective layers and cause drying and discoloration. For more information on this, please see our INFLATABLE BOAT CLEANING AND STORAGE article.
- Remember, how you treat your boat will determine its lifespan. Abused and mishandled boats are not covered by the Newport Warranty.
13. Inflatable boat owners manual
- To view & download PDF versions of Newport product manuals. Visit the downloads page at www.newportvessels.com/downloads/.
14. What are my boats dimensions?
- Dana - Hardwood Floor Inflatable Boat - 8ft 10in
- Del Mar - Hardwood Floor Inflatable Boat - 9ft 6 in
- Newport - Hardwood Floor Inflatable Boat - 10ft 6in
- Baja - Hardwood Floor Inflatable Boat - 11ft 9in
- Catalina - Hardwood Floor Inflatable Boat - 12ft 6in
- Carmel - Air Floor Inflatable Boat - 7ft 7in
- Seascape - Air Floor Inflatable Boat - 9ft
- Santa Cruz - Air Floor Inflatable Boat - 10ft
You can also find more specific dimensions and specifications on the individual product pages https://newportvessels.com/boats/.
15. How do I properly tow my inflatable boat?
- When towing your boat, the inflatable must be empty when towed by another boat. The towing line should be secured to the D-rings on each side of the inflatable. Never tower your boat by the bow ring. If the inflatable only has a bow ring, take the boat directly onboard the towing boat. The bow ring should only be used to attach a mooring line. You can also read our article Towing Your Dinghy for more details.
16. How do the air valves work?
- Newport utilize Halkey-Robers valve systems that are one-way valves. The simple rugged one-way valve makes inflation easy. The inner valve design allows air to flow into the hull but not out, and the outer valve cap makes the seal permanent. The plastic stem or button on the inner valve allows the boat to be deflated. Push in and turn to release the air. Make sure the plastic stem is in the "out" or "closed" position for inflation.
17. Do you ship to Alaska, Hawaii, and Canada?
- Yes, we do ship to Hawaii, Alaska, and Canada! Please checkout directly through our website. Duties, taxes and brokerage fees will be collected up front from order shipping to Canada for your convenience. The buyer is responsible for these duties, taxes and brokerage fees.
18. I found a coupon, but it isn't working. Why not?
-
COUPONS FROM NEWPORT -
We occasionally send out coupons via our Newsletter. Please ensure that you copy and paste the code. Please also double-check that there are no spaces in front or behind the code. Writing or typing the code out can lead to incorrect characters being used. If your coupon is not working for the item(s) in your cart, please double-check the details on what the coupon can be used for. If you are still experiencing issues with your coupon, please contact us directly. -
COUPONS NOT FROM NEWPORT -
Newport has never worked with any 3rd party coupon site. We do not plan to work with these site in the future either. None of these codes will work and these codes will not be honored on our site. Do not risk your information or the security of your computer by clicking on these websites and their links. If you would like to receive codes or discounts, the best way is to sign up for our Newsletter. Our newsletter notifies you of any upcoming deals and sometimes contains discount codes that can be used at checkout. You can sign up by going to the bottom right corner of any page on www.newportvessels.com.